FIBARO - Walli Controller Anthracite
search
  • FIBARO - Walli Controller Anthracite
  • FIBARO - Walli Controller Anthracite

FIBARO Walli - Walli Controller Anthracite


FGWCEU-201-1-8
€56.40 Tax included

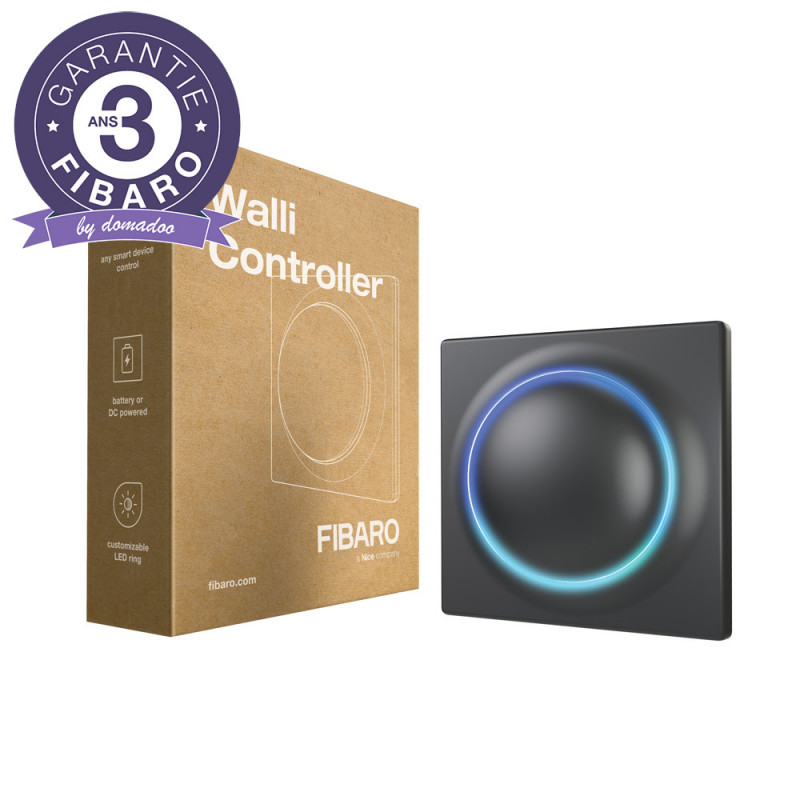
FIBARO Walli Controller is a smart wall-mounted Z-Wave remote controller that can activate scenes or control other Z-Wave devices via associations. Colour Anthracite.

Quantity


Security guarantees


Shipping Policy

  

Fibaro Walli Controller

FIBARO Walli Controller is an intelligent on-wall battery or DC operated controller. It can be used in Walli multiframes and act as additional button for other devices.

Goodbye! – smart leaving

You can put your Walli Controller near your front doors so you can say goodbye to your home with just a single click.

Goodbye scene can:

  • turn off all lights,
  • decrease the temperature at your home,
  • set shutters and curtains to a desired position,
  • arm your alarm,
  • lock your doors,
  • close the gates or garage doors.

Just as you like it! – granular light control

There are other remotes which can trigger an action, but no other controller is that smart. Walli Controller can act just as your regular Z-Wave dimmer so you can dim the lights to any level you want.

Walli Controller:

  • is a smart Z-wave remote,
  • supports associations,
  • understand other devices,
  • can communicate with other Z-Wave devices directly.

Control them all! – smart living

Opening, closing, adjusting, changing the position of all shades or shutters in house can be tiresome. With Walli Controller you can control them all at once. Not only at once, but also to the very exact position, as this is not a simple button, but a smart switch.

Walli Controller:

  • versatile smart controller,
  • flexible and appropriate for many settings.

Good night! – put your home to sleep

If you didn’t have switches at your bedside table, don’t worry! Walli Controller is a hassle-free battery powered wall-mounted button which can be easily applied basically anywhere. Now you can set up your Good night scene you always wanted.

Good night scene can:

  • arm areas which shouldn’t be visited at night,
  • send you an open window report to your smartphone,
  • adjust bedroom temperature,
  • lock front doors.

Too late for electrical changes? – battery for the rescue

You already finished your home? It’s too expensive to add electrical installation here now? Walli Controller was prepared for situations like this. Whenever you feel there is a need for additional switch, just put Walli Controller there. It comes with double-sided tape, so you’ve got everything you need right of the box.

Walli Controller as a 2-way switch:

  • can be added without prior electrical installation,
  • can be configured in the FIBARO System to act as a switch in a 2-way installation, meaning it can turn on and off a single lighting source together with another Z-Wave switch.

Upgrade your Walli! – more buttons without making a mess

Smart home gives you endless possibilities, but for that you will certainly need some buttons. You cannot be prepared for every scenario but with Walli Controller you don’t have to. You can add additional Walli Controller to an existing Walli switch just by changing the cover plate.

Walli Controller:

  • is compatible with Walli frames,
  • don’t need a flush-mounted box,
  • can extend a single or double flush-mounted boxes

FEATURES :

  • Universal surface-mounted button for starting scenes
  • Pre-set configurations allow to easily adjust operation for specific type of controlled devices
  • Battery operated or DC powered
  • Can be assigned any role, e.g., a light switch or a button for roller blinds
  • Compatible with Walli product line, but also perfect as a separate button
  • DC wire connector and double-sided adhesive stickers included in the box
  • Equipped with a built-in temperature sensor
  • Supports Z-Wave network Security Modes: S0 with AES-128 encryption and S2 Authenticated with PRNG-based encryption
  • Works as a Z-Wave signal repeater when VDC powered (all non-battery operated devices within the network will act as repeaters to increase reliability of the network)
  • Z-Wave 700 chipset
  • Lights up with 8 colorful ring illuminations
  • Capable of 8 different key combinations

TECHNICAL DATAS :

  • Power supply: Battery and/or power supply unit
  • Battery type: ER14250 ½AA 3.6V (included)
  • Supply unit type: 5–24V DC SELV power supply, LPS or NEC class 2 (not included)
  • Battery life: est. 2 years (with default settings and max. 10 pushes per day)
  • Operating temperature: 0–40°C
  • Ambient humidity: 0–90% RH without condensation
  • Radio protocol: Z-Wave (700 series chip)
  • Radio frequency band: 868.0–868.6MHz
  • Max. transmitting power: +13dBm
  • Range: up to 50m outdoors, up to 40m indoors (depending on terrain and building structure)
  • Dimensions (H x W x D): 86 x 86 x 20mm
  • Compliance with EU directives: RoHS 2011/65/EU, RoHS 2015/863, RED 2014/53/EU

FGWCEU-201-1-8

Data sheet

Type
Wall switch
Functions
Emitter
Temperature
Technology
Z-Wave Plus V2
Power Supply
12/24VDC
Battery
Compatibility
Eedomus
Fibaro HC3
Fibaro HC3 Lite
Jeedom
Z-Wave specificity
Security S2
SmartStart

The reset procedure restores the device to factory settings, which means that all information regarding the Z-Wave controller and user configuration will be deleted.

Factory reset does not reset power consumption memory.

Resetting the device is not the recommended method to remove it from the Z-Wave network. Use the reset procedure only if the primary controller is missing or inoperable. The exclusion of certain devices can be achieved by the exclusion procedure.

1. Quickly triple tap and then hold either button for 21 seconds.

2. Release the button when the device turns yellow.

3. Quickly press the button to confirm.

4. After a few seconds, the device will be restarted, which is signaled by a red LED.

Does this answer your question?
Yes (0)
No (1)
Sorry about that
How can we improve it?
Submit
Thanks
Your feedback helps improve this answer for everyone.

The exclusion procedure removes the device from the existing Z-Wave network. This also causes the device to be reset to factory settings.

To remove the device from the Z-Wave network:

1. Put the main controller in exclusion mode (see controller manual).

2. Quickly press one of the buttons three times, then press and hold the button for 12 seconds.

3. Release the button when the LED turns green.

4. Quickly press the button to confirm.

5. The LED flashes yellow, wait for the process to complete.

6. The success of the exclusion will be confirmed by a message on the Z-Wave controller and the red color of the switch indicator.

Does this answer your question?
Yes (0)
No (0)
Sorry about that
How can we improve it?
Submit
Thanks
Your feedback helps improve this answer for everyone.
Pour ajouter le Walli Controller au réseau Z-Wave manuellement:

1. Mettez le contrôleur principal en mode inclusion (voir le manuel du contrôleur).

2. Rapidement, appuyez trois fois sur l’un des boutons.

3. Si vous ajoutez en mode Security S2, entrez la partie soulignée du DSK (étiquette au bas de la boite d'emballage).

4. La LED commence à clignoter en jaune, attendez la fin du processus d’inclusion.

5. Le résultat de l'inclusion sera confirmé par un message sur le contrôleur Z-Wave et la LED de l'interrupteur :

  • Vert - réussi (non sécurisé, S0, S2 non authentifié),
  • Magenta - réussi (Security S2 authentifié),
  • Rouge - pas réussi.
 

Pour ajouter le Walli Controller au réseau Z-Wave à l'aide de SmartStart:

1. Pour utiliser SmartStart, votre contrôleur doit prendre en charge Security S2 (voir le manuel du contrôleur).
2. Entrez le code DSK complet dans votre contrôleur. Si votre contrôleur est capable de scanner un QR code, scannez le QR code placé sur la boîte ou l'étiquette de l'appareil.
3. Mettez le Walli Controller sous tension.
4. Attendez que le processus d'inclusion démarre (peut prendre quelques minutes), ce qui est signalé par le clignotement de la LED jaune.
5. L'inclusion sera confirmé par le message du contrôleur Z-Wave et la LED:

  • Vert - réussi (non sécurisé, S0, S2 non authentifié),
  • Magenta - réussi (Security S2 authentifié),
  • Rouge - pas réussi.
Does this answer your question?
Yes (0)
No (0)
Sorry about that
How can we improve it?
Submit
Thanks
Your feedback helps improve this answer for everyone.

You might also like