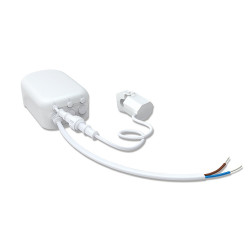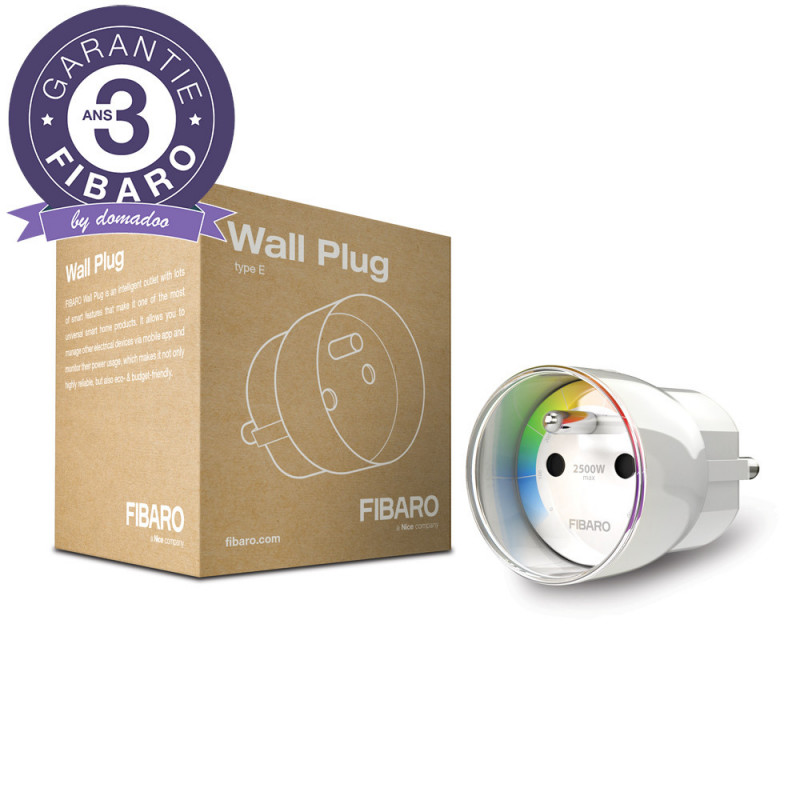


FIBARO Wall Plug is an intelligent, ultimate plug and play, and most sophisticated, controlled remotely outlet adapter. French/Belgium socket version (type E).

Security guarantees

Shipping Policy
FIBARO Wall Plug is an intelligent, ultimate plug and play, and most sophisticated, controlled remotely outlet adapter. This highly functional Wall Plug can be applied wherever you want to control electrical devices, while monitoring the energy consumption in a convenient and maintenance-free way.
Wall Plug automatically turns off broken devices to prevent a short circuit. The system will also send you a notification about broken appliances, so you can call the service before returning home.
Already on the way to work and you cannot remember if the iron was turned off before leaving? With Wall Plug you will never worry about things like this. With its help you can quickly turn the iron off from any place.
Wall Plug with its crystal LED ring emits a soft, pleasant light, which can replace a bedside lamp. It can be turned on permanently or activated when needed with a button on the casing.
Wall Plug will help you to locate the most energy-consuming devices in your home. Colour of the LED ring informs you about current power consumption of plugged device. Wall Plug also allows you to generate practical charts of energy usage for individual rooms or home appliances.
Wall Plug is tamper-resistant and safe for children. Now your child can explore the world safely.
Your children spend too much time in front of the video game console or TV? Wall Plug allows you to put a time limit on the use of these devices. Thanks to information about power consumption you can also check if your children are playing, when it is time to do their homework. The devices can be turned off remotely if necessary.
How much time does it take to fix a loose electrical outlet? There is no need to answer this question any more. Each Wall Plug is equipped with a special protective sticker that prevents the outlet from being pulled out of the wall.
Wall Plug may switch the devices into a stand-by mode when they are not being used. You decide after what time does it happen. Without any effort, unnecessary energy losses are limited and your electricity bills become lower.
Phone charger consumes power even when the plugged device is fully charged. Wall Plug automatically cuts the power off, immediately after charging of the device is finished.
FEATURES :
TECHNICAL DATAS :
Data sheet


Francois B. published the 24/03/2024 following an order made on 15/03/2024
Dommage que ce soit si cher!
Eric V. published the 10/01/2023 following an order made on 02/01/2023
Très bien, conforme à mes attentes, je recommande !
P-ch D. published the 15/02/2022 following an order made on 08/02/2022
Simple rapide à brancher, je ne compte plus le nombre sur mon installation domotique 😀
Anonymous customer published the 19/04/2021 following an order made on 23/02/2021
Inclusion OK avec eedomus, fonctionne bien.
Anonymous customer published the 13/02/2021 following an order made on 02/02/2021
RAS, une prise connecté simple à mettre en oeuvre et parfaitement fonctionnelle.
Anonymous customer published the 18/12/2020 following an order made on 06/12/2020
De loin la meilleure période z-wave du marché. En effet elle se synchronise à chaque fois en mode sécurité dès la première mise à jour du nœud sous jeedom. Au top
Anonymous customer published the 04/12/2020 following an order made on 22/11/2020
Produit indispensable pour la domotique
Anonymous customer published the 06/11/2020 following an order made on 14/10/2020
Matériel conforme à mes attentes
Anonymous customer published the 15/10/2020 following an order made on 27/09/2020
Prises utilisées sous jeedom, facile à configurer
Il n'y a qu'un seul moyen de réinitialiser la Prise Murale FIBARO. La procédure de réinitialisation efface la mémoire de la Prise, y compris toutes les informations sur les données concernant le contrôleur de réseau Z-Wave et la consommation d'énergie.
Réinitialiser la prise ne signifie pas qu'elle a été effacée de la mémoire du contrôleur du réseau Z-Wave. Supprimez la Prise de la mémoire du contrôleur de réseau Z-Wave avant d'effectuer la procédure de réinitialisation.
Le FIBARO Wall Plug intègre un testeur de portée du réseau Z-Wave. Suivez les instructions ci-dessous pour tester la portée auprès du contrôleur principal:
1) Appuyez et maintenez enfoncé le bouton B jusqu'à ce que la LED s'allume en violet.
2) Relâchez le bouton B.
3) Appuyez sur le bouton B à nouveau, brièvement.
4) La LED indique la portée du réseau Z-Wave.
VERT CLIGNOTANT – La prise tente d'établir une communication directe avec le contrôleur principal
VERT – La prise est en communication directe avec le contrôleur principal
JAUNE CLIGNOTANT – La prise tente d'établir une communication avec le contrôleur principal via d'autres modules
JAUNE – La prise est en communication indirecte avec le contrôleur principal
VIOLET CLIGNOTANT – La prise est en communication avec le contrôleur à la limite de la portée de celui-ci
ROUGE – La prise ne peut pas se connecter au contrôleur principal, ni directement ni par l'intermédiaire d'autres nœuds du réseau Z-Wave
Pour entrer dans le menu, appuyez et maintenez le bouton B pendant au moins 3 secondes.
La position dans les menus sera signalé par les différentes couleurs de l'anneau LED selon le schéma suivant :
VIOLET - Test de portée du réseau Z-Wave
JAUNE - Device reset
Assurez-vous que la valeur du paramètre N°61 n'est pas égale à 9.
Assurez-vous que la valeur du paramètre N° 62 n'est pas égale à 8.
2. L'éclairage de l'anneau LED est réglé sur une seule couleur.
Assurez-vous que la valeur du paramètre N°61 est égale à 1 ou 0.
Assurez-vous que la valeur du paramètre N°62 est égale à 0.
Pour suivre la consommation d'énergie dans l'interface graphique du contrôleur Z-Wave, il doit avoir cette fonctionnalité. Veuillez vous adresser à l'assistance de votre contrôleur Z-Wave.
2. La fonction suivi de la consommation d'énergie est désactivée dans le contrôleur de Z-Wave.
Pour suivre la consommation d'énergie dans l'interface graphique du contrôleur Z-Wave, cette fonctionnalité doit être activée. Veuillez vous adresser à l'assistance de votre contrôleur Z-Wave pour activer cette fonction.
3. Je n'ai pas de courant.
Essayez de remettre le courant.
Veuillez vérifier le réglage de ces paramètres ou restaurer les valeurs par défaut.
2. Le Wall Plug FIBARO est hors de portée du contrôleur Z-Wave.
Le Wall Plug FIBARO doit être à portée directe du contrôleur Z-Wave ou à portée d'un autre nœud sur le réseau maillé Z-Wave. Rapprochez-le d'un autre dispositif déjà inclus au réseau.
3. Le paramètre avancé N°47 a été modifié.
Choisissez le retour à la valeur par défaut du paramètre avancé N°47 (valeur = 3600).
Après réinitialisation, Le Wall Plug FIBARO retourne à ses paramètres par défaut. Pour l'utiliser, vous devez à nouveau réaliser l'inclusion à votre contrôleur Z-Wave.
2. L'alimentation est coupée.
Le Wall Plug FIBARO doit être alimenté en 110-230V AC. Veuillez vérifier votre alimentation en utilisant un testeur de tension ou un multimètre.
3. Le Wall Plug FIBARO est hors de portée du contrôleur Z-Wave.
Le Wall Plug FIBARO doit être à portée directe du contrôleur Z-Wave ou à portée d'un autre nœud sur le réseau maillé Z-Wave. Rapprochez-le d'un autre dispositif déjà inclus au réseau.
Le Wall Plug FIBARO ne peut pas supporter plus de 5 appareils par groupe d'association.
Ajoutez 5 dispositifs Z-Wave à un groupe d'association au maximum.
Le Wall Plug FIBARO doit être alimenté en 110-230V AC. Veuillez vérifier votre alimentation en utilisant un testeur de tension ou un multimètre.
2. Le Wall Plug FIBARO a été réinitialisé.
Après réinitialisation, Le Wall Plug FIBARO retourne à ses paramètres par défaut. Pour l'utiliser, vous devez à nouveau réaliser l'inclusion à votre contrôleur Z-Wave.
3. Le Wall Plug FIBARO est hors de portée du contrôleur Z-Wave.
Le Wall Plug FIBARO doit être à portée directe du contrôleur Z-Wave ou à portée d'un autre nœud sur le réseau maillé Z-Wave. Rapprochez-le d'un autre dispositif déjà inclus au réseau.
4. Le Wall Plug FIBARO est cassé.
Veuillez contacter votre revendeur afin de lancer la procédure de garantie.
Le Wall Plug FIBARO doit être réinitialisé.
2. Le Wall Plug FIBARO est trop éloigné du contrôleur Z-Wave.
Le Wall Plug FIBARO doit être à proximité du contrôleur Z-Wave pendant le processus d'inclusion.
3. Le Wall Plug FIBARO n'est pas alimenté.
Le Wall Plug FIBARO doit être alimenté en 110-230V AC. Veuillez vérifier votre alimentation en utilisant un testeur de tension ou un multimètre.
4. Le Wall Plug FIBARO a une fréquence différente (UE, États-Unis, ou ANZ) de celle de votre contrôleur Z-Wave.
Le Wall Plug FIBARO doit fonctionner sur la même fréquence Z-Wave (EU, États-Unis, ou ANZ) que votre contrôleur Z-Wave. Veuillez contacter votre revendeur afin de l'échanger contre un variateur compatible avec la fréquence de votre contrôleur Z-Wave.
5. Le Wall Plug FIBARO est cassé.
Veuillez contacter votre revendeur afin de lancer la procédure de garantie.
Oui, le Wall Plug FIBARO reconnaît automatiquement la charge connectée et est protégé contre les courts-circuits et en cas de surtension. Cette fonction permet de désactiver l'appareil contrôlé s'il dépasse une limite de puissance définie auparavant. La LED passera du jaune au rouge pour signaler cet état.
Oui, l'anneau LED du Wall Plug éclaire d'une lumière bleu pâle ou blanche lorsqu'elle est branchée et sous tension. Elle peut donc être utilisée comme veilleuse. La douce lumière peut être activée et désactivée en appuyant sur le bouton B situé sur le boîtier.
Vous pouvez connecter plusieurs Wall Plug à proximité les un des autres. Ils fonctionneront correctement en dépit de cette proximité.
The LED ring light can be turned off completely. To do this :
1) Connect the FIBARO Wall Plug to an outlet,
2) Hold button B for 2-5 seconds until the LED ring turns white,
3) Release button B,
4) Briefly press button B.
After the LED ring has been turned off, it can be turned back on by repeating this same procedure.
The FIBARO Wall Plug stores power consumption data in its memory – disconnecting the power from the outlet will not erase the data. To reset the power consumption memory:
1) Connect the FIBARO Wall Plug to an outlet,
2) Hold button B for 5-10 seconds until the LED ring turns green,
3) Release button B,
4) Briefly press the B button. Resetting the electricity consumption memory will be signaled by a double green flash of the LED ring.
This happens due to voltage fluctuations on the network, due to cable lengths and voltage drops between sockets.
The power data given by the manufacturers are often based on rough estimates or are measured under optimum conditions. Actual power under normal conditions depends on mains voltage, device status or ambient conditions. It is therefore possible that two identical devices with the same indicative consumption figure consume different amounts of energy.
You can find this information by performing a Z-Wave range test:
1) Plug the FIBARO Wall Plug into a socket,
2) Hold button B for 10-15 seconds until the LED ring turns purple,
3) Release button B,
4) Briefly press button B.
5) The LED ring indicates the range of the Z-Wave network (green = direct connection, = yellow via another device)
6) To exit range test mode, briefly press button B.
Check advanced configuration – parameter 61 (by default it should be 1). You can also activate the ring light by pressing the B button until the LED ring starts flashing white, then release the button and short press again. If that doesn't work, try resetting the Wall Plug.
Yes, it is even recommended to perform the device integration within direct range of the main controller. Make sure, however, that the final location of your Wall Plug is still within range of the Home Center controller. Press button B three times when your socket is in its final location to adjust the network.
When connecting a device to the socket, make sure that its power does not exceed 2500 W.
You might also like
FIBARO Wall Plug is an intelligent, ultimate plug and play, and most sophisticated, controlled remotely outlet adapter. French/Belgium socket version (type E).